|
I hope that you and your family are healthy and happy. These are rather unusual times we find ourselves in. Staying home and staying safe during a pandemic has had its challenges around the world. Each of us is experiencing it differently for sure. There has been a saying circulating the internet. "We are NOT in the same boat together...but we are all facing the same storm." I hope that we can all keep each other afloat. Let's lend a hand where we can and keep the storm from getting bigger. And now.. On with the post.
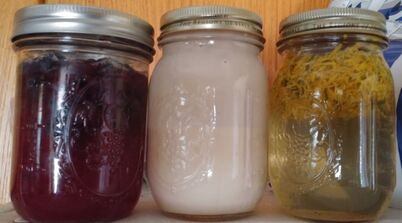
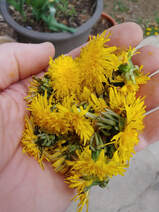
Maybe you have noticed an odd thing has happened with the pandemic. People have decided to spend their "home time" baking. Many specifically baking sourdough bread. Why sourdough though? Well, because in addition to people unnecessarily hoarding toilet paper, it seems that “active dry yeast” was also hoarded. So, sourdough is in vogue. Unfortunately with that so is the recycling of all of the myths associated making a sourdough starter. For instance, an 8 yr old starter isn't really any better than a one month old starter, or the idea that you need to get a starter from someone else willing to share theirs with you. My hope with this slightly unusual blog post is to show you how to find, capture and harvest yeast so that you can make your own starter. This specific post is NOT however, about making a sourdough starter. Instead it is a primer for my next post where I will be showing you how to make a starter from yeast you harvest yourself. But we have to have a yeast first and this post is about creating a "yeast water". For this blog post and the one that will follow, I have decided to bring my world of yeast cultivation and tenkara together. They are similar in some ways in that they both require a certain amount of mindfulness and patience. I am going to keep this as simple as possible so that you can have easy success and hopefully you will be inspired to continue this equally meditative practice going long after the pandemic has passed. (Sooner than later, we all hope.) There are so many references on line that I could list but frankly, I want you to start as simple as you can and if you are inspired, dig deeper. Gathering yeast from the wild Yeasts are all around us they surround us in our lives. They are around us, on us and even inside us. But not all yeasts are desirable. We want to look at capturing and cultivating some specific wild yeasts. Ones that are very good in baking. This whole process can be a strangely satisfying activity. Much like catching a fish on fly you personally tied, so is the process of gathering and nurturing a yeast culture into a usable medium we can then bake with. Choose a “host yeast ingredient” This is the creative and fun part. Yeast waters are made from things you can forage in the wild like juniper berries, new pine needle tips, rose-hips, dandelions, etc. If it is an edible plant with a certain amount of naturally occurring sugars, you can bet that it has yeast growing on it. You don’t have to go into the wild though. You can also make yeast waters with store-bought fruits, berries, and other produce including culinary herbs. I always keep the straggling remnants of blueberries we buy that are left in the container after making sourdough blueberry pancakes. (recipe next blog post) The main consideration is how will the flavors of that yeast host add to the flavors of the bread you are making. Dandelion bread is amazing. Blueberry yeast water bread has a small hint of blueberry flavor and even color. Let your palate and imagination be your guide. Let's get started. Yeast water cultivation Once you have picked your yeast host it is time to get to work. You are going to need a few simple things to get started.
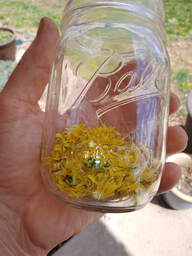
Directions: Put a ¼ cup to ½ Cup of your host yeast bearing ingredient(s) into the jar, add the non-chlorinated, room temperature water filling the jar almost to the top. Finally add a few tablespoons of sugar or honey. Some yeast hosts are naturally sweet so decide if you need to even add sugar at all. Finally, put a lid on the jar tightly and shake it up and put it somewhere slightly warm and out of the way and out of direct sunlight. I find that the top of my refrigerator is an excellent place that I won't forget about the continued steps. .
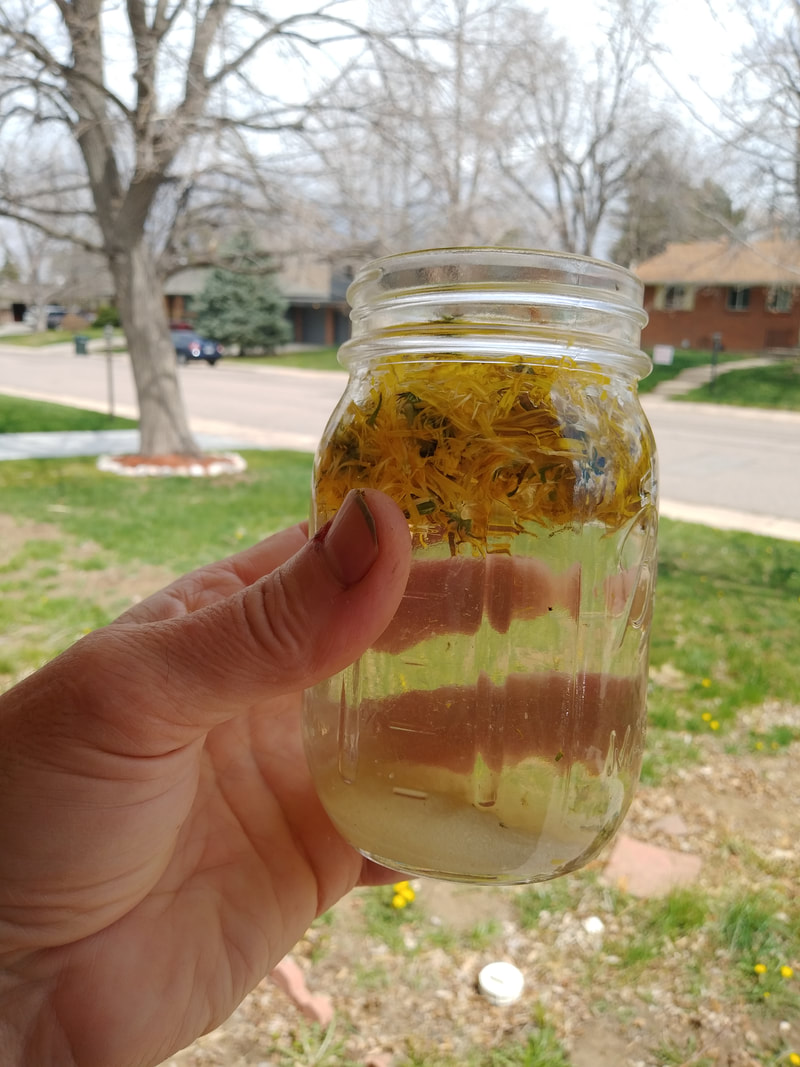
Food, moisture and warmth the "rod, a line and fly" of yeast cultivation... 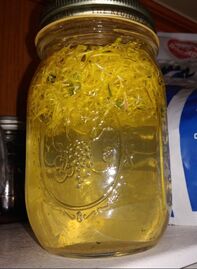 Day two: After the first 24 hours, you may not see much change other than maybe color of the water. Carefully open the lid of the jar to release any carbon dioxide gas that may have built up in the jar. CO2 is a bi-product of the yeast doing what it does naturally. In essence it eats the sugars and expels CO2 and converts the sugars to alcohol. Feel free to shake up the yeast water and leave it be. You can repeat this process a couple of times a day if you want. Day three or four: As the yeast does it's work, your yeast water will start to become more carbonated. The host ingredients will rise and and fall and will eventually float to the top. Each day you continue to shake the jar a bit, you give the yeast water a little oxygen by agitation. As the days pass though you will understand that you must be careful as pressure will build inside your jar. Once you see and hear the effervescent bubbles when you open the jar to “burp” it, you will know it is alive and ready to use. At this point you can remove the host ingredients and discard them. The yeast will continue to do it's job. Day five or six: At this point I suggest you give your yeast water a taste. You should get hints of the flavors from host. It has added it's own oils, flavors and sugars that are now infused in the yeast water. If by now you do not have an effervescent yeast water you might have to start all over. Something went wrong either in your yeast source or in temperature. Make sure your jar is clean, the water is de-chlorinated and that you are using fresh clean host ingredients. Wild Sodas Continue to feed or store in a refrigerator If you aren’t going to use your yeast water within a week or so, you are going to want to put it into a refrigerator. Cooling it down will slow it down and keep it from completely fermenting too far into an alcohol level of 4 to 5%. This level of alcohol will start to kill off the yeast. You can always add sugar to your yeast water to keep the yeasts fed and happy. 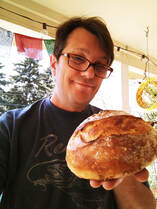 Now go get busy!
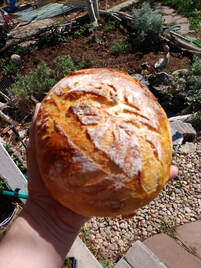
This takes very little time to do. Go pick some dandelions off your lawn (the ones not christened by weed killer or passing dogs of course) give them a rinse and put them in a jar with some clear water and a bit of sugar. in a few days you will have a yeast water concoction that I will be teaching you how to make bread with on my next blog post on making bread and sourdough starter with yeast water. I will be fervently writing that post over the next few days, but I do need to get my current loaf of bread out of the oven. My first loaf of dandelion for the season.
4 Comments
|
|
Telephone(720) 371-9985
|
tenkarapath@gmail.com
|