TenkaraPath Blog
  • ON THE PATH
  • CONTACT
  • TENKARA AS PRACTICE
  • TENKARA PATH STORE
  • ON THE PATH
  • CONTACT
  • TENKARA AS PRACTICE
  • TENKARA PATH STORE

D.I.Y. Replacement Rod Cap

3/1/2019

5 Comments

 
Picture
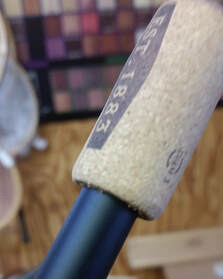
Somewhere in the depths of hell, near the same corner where all the unmatched odd socks collect there is a second pile of lost items known exclusively to tenkara anglers around the world. In that pile are small plastic end caps to tenkara rods. We have all lost at least one if not 30 of those handy, but tiny caps that keep our rods from telescoping out of our sling packs on the trail or extending themselves out in the back of our cars.  The rod cap is a special item that we all can agree should be easy enough to keep track of yet somehow finds the portal to the netherworld at the bottom of our pockets.

I have explored a few different ways to create a suitable replacement cap and think that I have stumbled on a fairly practical as well as aesthetically pleasing solution. Ladies and gentlemen please be amazed at this wonderful, practical, customizable and charming rod cap made from the humble wine cork.


You don't need a semi-fancy wood-shop to make one of these stylish and useful rod caps. While I make these pretty quick with some power tools in my shop I decided that I would teach here how to make one using just some basic tools that you probably already have in your garage or that can be purchased inexpensively at a hardware store or borrowed from you neighbor next door. The instructions that follow are given with the express warning that any craft project has it's hazards. Please be careful when making your end cap and use common sense so that you still have fingers to tie your flies on with.

Supplies you will need

Wine Corks.
Sand paper 150 grit and maybe a 220 grit
Drill bits (forstner bits preferably) Should match the size of your rod end
A power drill or drill press (optional)
some cording such as rawhide or paracord

Step one:
Pick a wine cork

As many of you know, I work in restaurants doing magic. Most restaurant that have a bar and serve wine will likely have a large collection of wine corks.  They are often happy to give you a ton of them for no charge. If you are too shy to ask you have the conventional method of buying a bottle of wine or two and saving the corks. You may even have one in your junk drawer right now. How you get the corks is not important. You will however want to have a selection to choose from. Corks come in different densities.  Not all corks are equal but for the most part any wine cork will work for this project.  They need to be in good condition though.  Personally I prefer the more dense corks. These are the ones that seem like they are made from lots of teeny tiny pieces of compressed cork. There are also more rubberized types of corks available too. These will work but you kind of lose the rustic nature that a cork offers. You will want a cork that isn't damaged or have too much damage done to it from the cork screw when it was pulled from the bottle.
As you can see in the photo there are lots of interesting stamped  designs as well as plain corks to choose from. That is up to you.
Picture
This box of corks came from a restaurant that I perform at.This is what they had at the end of the night.

Step Two:
Pick your bit

 The hole you are going to make in your cork should be close to if not just a hair's width narrower in diameter than the rod section that the cap fit on.  It is better to go smaller than larger though because we will be sanding the hole out larger if we need a better fit.

I use "Forstner" drill bits but you can use a standard bit as well. The forstner bit has a unique blade design that lets you drill smooth sides and a flat based hole. These bits come in all the standard sizes and not prohibitive but are a little expensive. Worth the investment for me.

Once the bit is selected you need only find the center of the cork. Attach the bit to a power drill or drill press if you have one. You will need to work slowly and drill as straight a bore into the cork as you can. Don't rush as you risk drilling all the way through the cork or out of the side of the cork and into your hand. Let the drill turn as slowly as you can make it. Do yourself a favor maybe and don't do what I am showing you in the photos here. Wear gloves or better still put your cork into a vise as you drill it.
Picture
You can also use a smaller bit to pre-drill and create a "pilot hole" for the correct size bit.
Picture

As you drill the hole be sure that you don't go too deep. stop along the way and make sure that you have a good 3/8 to 1/2 of an inch of cork at the very end still that is not drilled out. Drilling all the way though defeats the whole purpose.
Picture
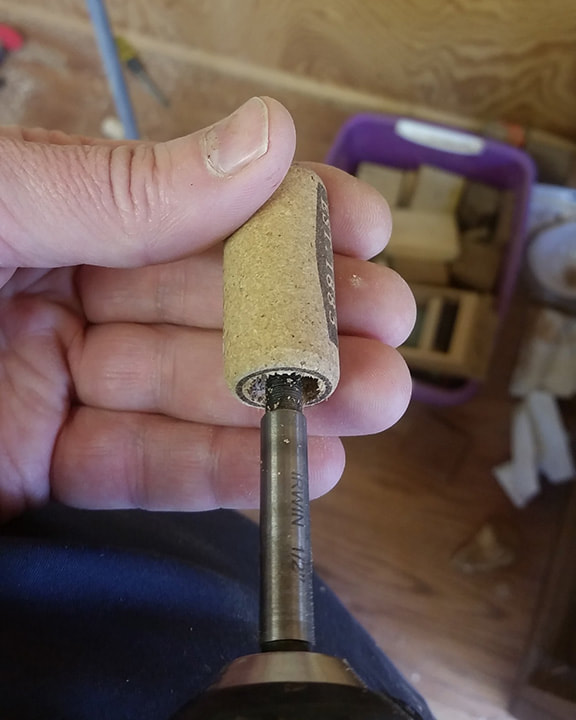
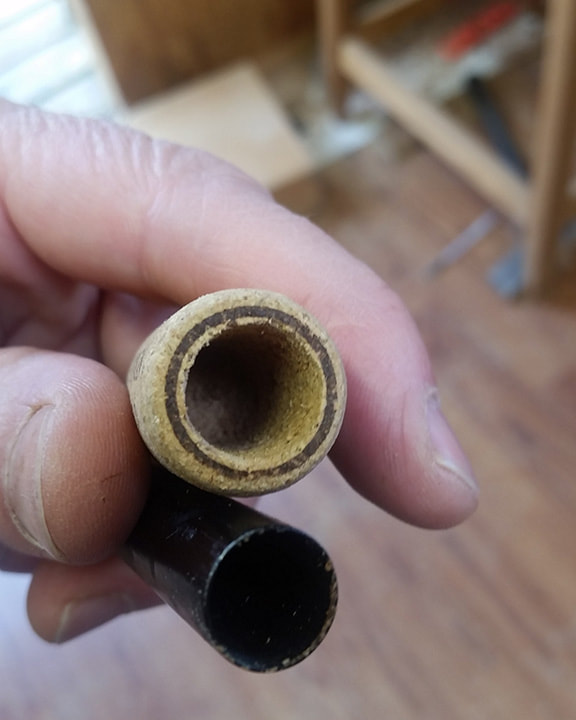
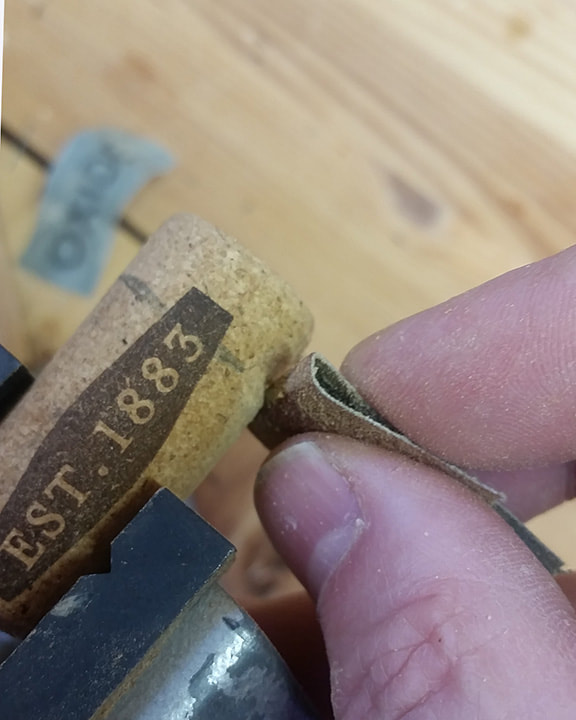
Once the hole is drilled out you can then test fit it onto the rod. If it is too tight to put on the end of the rod DO NOT FORCE IT. You could damage the rod segment.  The cork should slide on just snugly enough to stay on. If it is just a slight bit too small to fit, you can run the drill into the hole and move it around just slightly to make the hole just a little bit wider still....OR move on to the next step and make the hole larger during the sanding and finishing. If it is too big and slides off you need to probably start over and try a smaller bit and work up to the size you need for a tighter fit.

Step three:
Get a good fit and finish.

This is the point where you need to be careful not to over-work sanding and sizing the cork cap to fit. Sanding the inside out helps to smooth out the inside of the cork. Drilling into the cork leaves "burs" of cork bits. You don't want these falling down into your rod shaft so you sand them down.  I use a semi-course 150 grit wood sand paper to start followed by a 220 grit sand paper. Depending on the size of your rod the hole may be small and the sanding will be more difficult. In those instances I recommend rolling sandpaper up into a narrow tube shape that fits into the hole and then twisting it to let the sand paper do its work.
Picture
Picture
Smaller rod cap holes are somewhat trickier to sand out but are not impossible. This is another reason to use the forstner bits if you can because they cut a nicer hole than standard bits.

Step four:
A creative finish

 Certainly you can decide that you are happy and now done with the cork cap at this point.  BUT you may also want to kick it up a notch and sculpt it a bit. Cork sands very nicely. You can use a piece of sand paper to shape your cork cap a little too. Sand a bevel on the top end of cork or sand off the the printed design on the cork so that you can put your own personalize marks on the cap. Color the cork with a marker or stamp your initials onto the cap. I have found that it is a nice touch to put a piece of cording or rawhide on the end of the cork near the hole. This can help add just a touch more tension as well to the opening and create a better grip of the cap onto the rod. To do this you should use sand paper to make a groove around that section of the cork for the cording to rest in. Once that groove is made you need to put the cap on the rod and then carefully put the cording around the groove and then cinch it down just lightly enough to make the cork contract slightly around the rod tip.
Picture

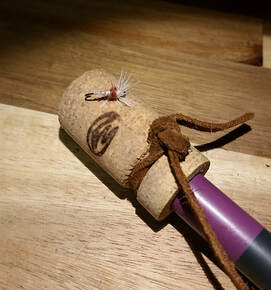
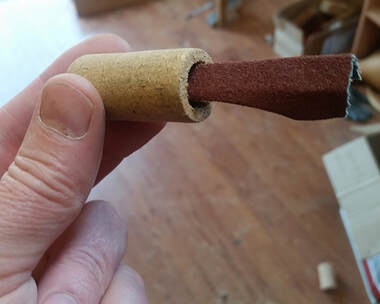
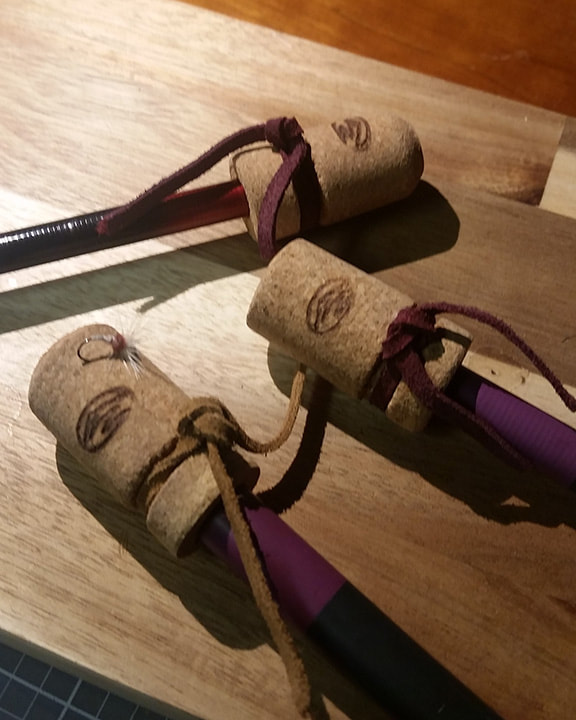
Making stuff yourself is so much fun.

I hope that you enjoyed this D.I.Y. project and that you decide to give it a try yourself. The trick with any project is to be ready to start over or to adapt if an element of a project doesn't quite work the way you want it to.

These rod caps are so practical and are a great reuse of wine corks. Much of D.I.Y. is just trying out ideas to see what happens. You learn a lot about improvising and if you are like me you get a lot of "what if" ideas along the way too. With the cork caps I realized you can also use the caps as a place to carry extra flies or to let your flies dry out a bit.  The cork caps fit into your pocket nicely and are certainly not going to get lost as easily as the small stock caps that come with rods.

Let your imagination run a little wild.  I would love to hear from those of you who give this a try.

Too lazy to make your own?

Maybe you don't have the spare time, a workshop , tools, wine corks or patience or want to have to make your own cork rod cap. Well, that's fine too... 

I can tell you that I had fun playing around with these and figuring out the best way to make them and to be honest the best way is the way that I make them on my lathe and using my drill press and belt sander. The results are more consistent and I am able to make a really nice and finished rod cap this way. I would be happy to make some for you and I will be selling these soon on my etsy store in sets of three made to fit your specific rod.

Thanks for reading my blog and I look forward to hearing your questions and comments on this idea.
Picture
These are the ones that I have made in my shop using my lathe, drill press and belt sander.
#DIY #rodcap #tenkara #tenkarapath
5 Comments
    Picture
    Picture

    Dennis
    Vander Houwen

    Dennis lives in Colorado with his super supportive wife, talented artist son, a smart older dog, a 2 yr old river buddy dog, and a very lucky cat. 

    Dennis is an avid minimalist, wood craftsman, curious tinkerer,  student of life, and notably a deeply focused tenkara angler.

    Tenkara is a form of Japanese fly fishing that contains many lessons in its form, practice and history.

    This blog talks about embracing the simplicity of tenkara as a tool and example to enrich and inform your life.

    Always looking for great tenkara content. New and older article, video or  even helpful tips.
    SHARE HERE

    Quick jump to features

    TIE THIS!
    PATH NOTES
    TENKARA AS PRACTICE
    FEATURED ANGLER
    TENKARA SHOP NEWS

    Explore the Archives

    February 2023
    January 2023
    July 2022
    April 2022
    February 2022
    January 2022
    July 2021
    May 2021
    April 2021
    March 2021
    February 2021
    December 2020
    October 2020
    August 2020
    June 2020
    May 2020
    April 2020
    January 2020
    August 2019
    June 2019
    March 2019
    November 2018
    October 2018
    July 2018
    May 2018
    March 2018
    February 2018
    January 2018
    October 2017
    September 2017
    July 2017
    February 2017
    October 2016
    June 2016
    March 2016
    February 2016
    January 2016
    October 2015
    July 2015
    June 2015
    May 2015
    March 2015
    January 2015
    December 2014
    November 2014
    August 2014
    May 2014
    February 2014
    June 2013
    May 2013
    April 2013

    Categories

    All
    DIY
    Mindful
    Small Streams
    Tenkara Rod Cap
    Tenkara Simple
    Wyoming Tenkara

Proudly powered by Weebly