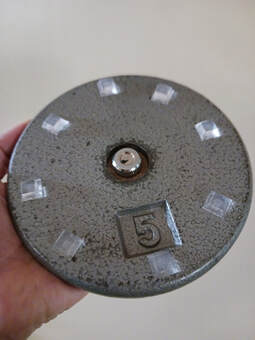
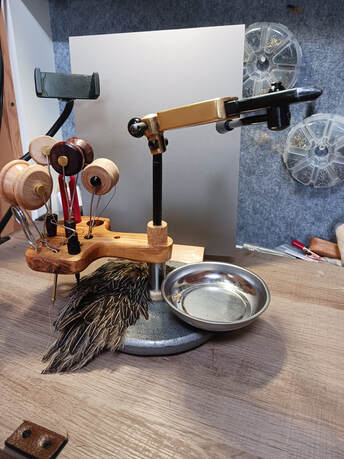
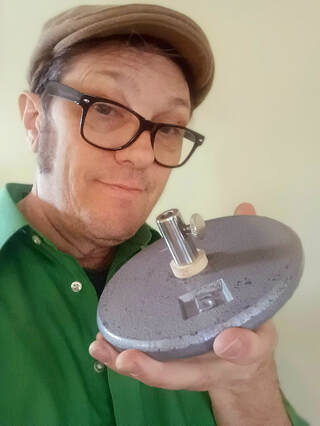
 Let me start by talking about my fly-tying Vise. For the longest time, I've been working away on this aftermarket vise I picked up from Bass Pro Shop. It's basically a knock-off of one of those high-end vise brands that rhymes with "Eagle". Looks good, gets the job done, but it doesn't come with that fancy brass branded button. I wont apologize for being frugal, so I can tell you that it didn't cost me an arm and a leg. But the quality was good enough for my use. I've got better things to spend my cash on, like saving up for another trip to Austria, you know? There has been this one pesky issue with my setup though. See, this vise of mine didn't come with a desktop base. Nope, instead, it's got this c-clamp to attach it to the edge of a table. It's alright, but not always the most convenient setup. You end up working from the edge of the table, which can get a bit awkward. So, I figured I'd look into getting a base for it. After doing a quick Google search I found a few affordable options, but where's the fun in that when I could just DIY it? For most of my DIY projects, I have a process where I just plant the idea in my brain and walk away to let my subconscious work away at it for a bit. I suppose its like casting a fly to a current that leads into a dark corner and letting it drift just a little longer than you would normally. Eventually, in this case, a few weeks later, I stumbled into a thrift store and found myself browsing through the sporting goods section. And there it was, sitting in a basket of odds and ends: a solitary 5 lb. flat steel disc . You know, the kind you'd slap onto each end of a curling dumbbell, but there was only one of them. My brain kicked in and I set the hook. This was the perfect thing to make the base for my vise. Being an odds and ends piece missing its mate, the price wasn't marked, so I asked the manager, and they hit me with "a dollar a pound". A more than fair deal, because I am now over 55 years old, and it was "Tuesday senior discount", bringing the total down to just $2.50. Can't beat that. Take advantage of your benefits of age folks. Its getting more difficult every year to find positive things about getting older. I will take this win.
Third Step: I came across a small challenge on my path. The vise post. Because it was made to be attached from a c-clamp it was taller than needed. With some slight trepidation, I convinced myself to break out the hacksaw and take about 5 inches off the end. I cleaned up the cut end by rounding it out on my bench-top grinder. Fourth Step: Gotta protect those table surfaces. Slapped on some small self-adhesive rubber bumpers to keep the weight from scratching up any table I decide to work on. Simple but effective. I may change these out later but for now these do the trick. And there you have it – my very own DIY vise base, ready to tackle any fly-tying adventure that comes my way. I love projects like this that make my brain work out solutions. When I visit a hardware store I don't seem to ever be thinking of using items I find in their traditional manner. I see it's function and potential differently. The shape of an item, how it connects or can be connected to something else is really all about using my imagination. Perhaps that is why I like hardware stores so much. They tickle my brain. I suppose it is this same reason that I like thrift stores too. You never know what you will find that you can use to solve a problem or finish a project.
0 Comments
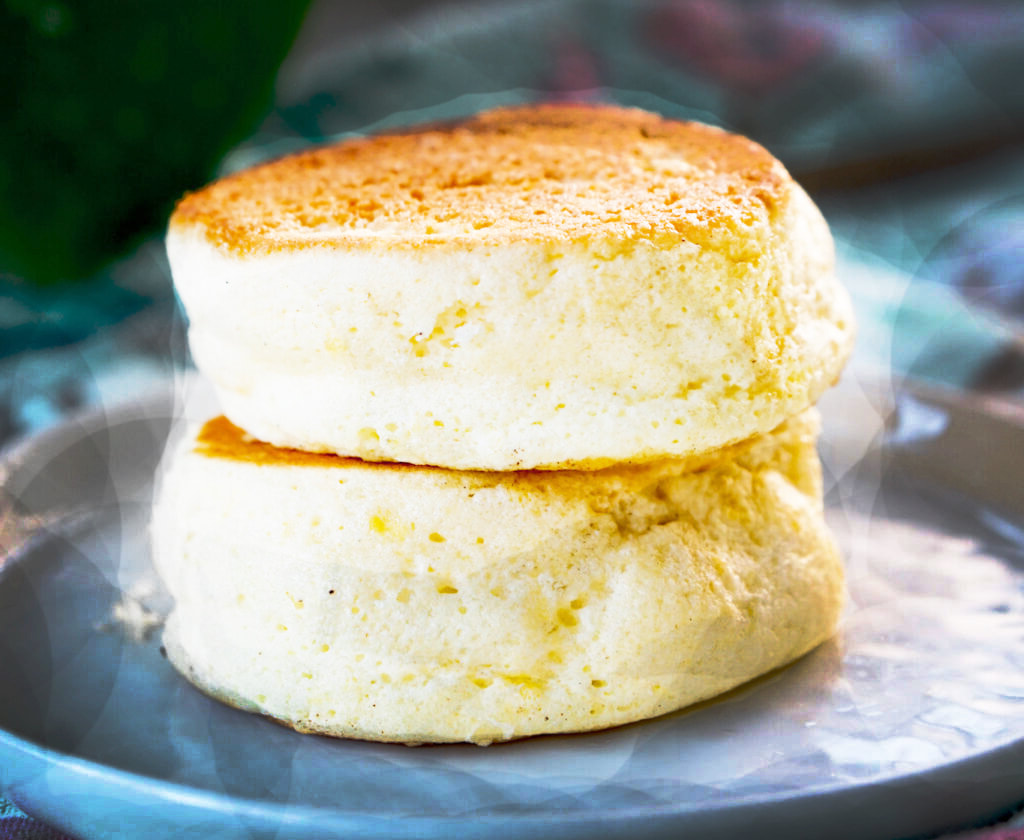
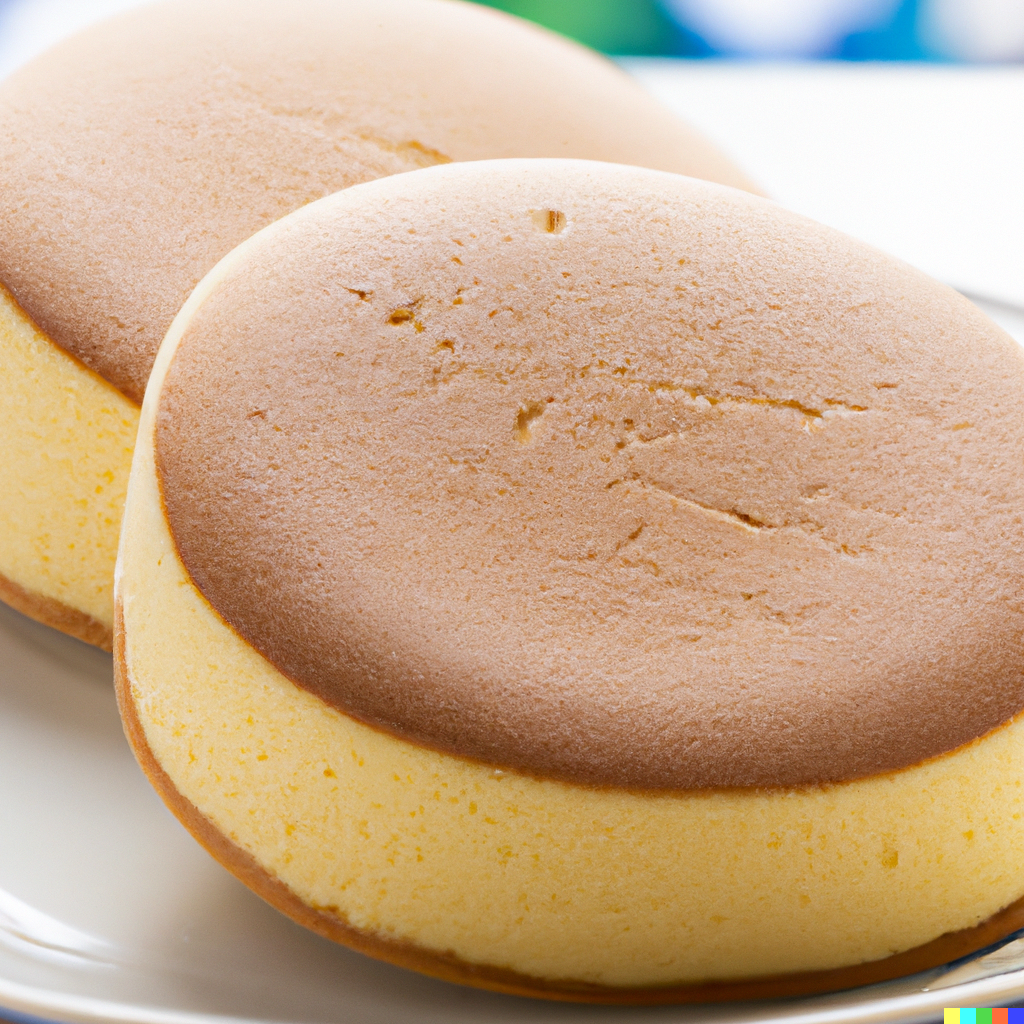
Just about ever weekend I find myself cooking up some kind of pancake. I have become the "Pancake King" in my family. I make all sorts of pancakes including Danish “aebilskivers”, French crepes, Dutch babies, and of course the traditional buttermilk or sour dough pancakes too. Now I have a new pancake from Japan. IHOP has nothing on me! While the video clip was well produced, the recipe in the caption left much to be desired. My main complaint being that it gave time for cooking but no temperature. For the recipe that follows, I did the work for you, so you at least know where to start. The second thing that helps these work better is the use of a tall-sided, no-stick pan with a glass lid. The tall sides help hold in heat to surround the pancakes as they cook and rise. The lid lets you watch them cook and keep from burning.
Instructions: 1. Separate eggs into two bowls. One for the yolks and one for the whites. Set aside the whites. In the bowl with the yolks add milk and vanilla. Whisk together then add flour and baking powder and hand whisk until combined and smooth. 2. In the bowl with the egg whites, slowly add granulated sugar as you use an electric mixer to whip the whites to the point that they have stiff peaks. Fancy chefs call this a "meringue." 3. Fold about half of the meringue gently into the egg yolk/flour mixture folding as you go then add the rest. Carefully combining them until just blended. DO NOT OVER MIX. 4. Heat a medium to large high sided pan with a lid (preferably glass) on low heat. Add a little butter or spray oil to the pan just to give it an extra layer of non-stick. 5. Ladle batter in four, 1/3 Cup dollops of batter around the pan leaving room for expansion. You want them to spread to about 3 inches wide. Once you have these four cakes started, add another 1/3 Cup Dollop on top of each of those again. Sprinkling in a tablespoon of water to the pan and cover with the lid. 6. Cooking time is going to vary slightly. These are cooked low and slow. Practice patience and don’t dare try to cook these fast. They will burn. Cook for 3-4 minutes. Using a wide spatula gently check the bottom to see that it is light golden brown. If so turn the pancake over, add another spoon of water, cover, and let cook for another 3-4 minutes. Plate immediately. Serve these with fruit, berries, and whipped cream, or top with butter and syrup. Enjoy. Don’t let the seemingly complex steps of this recipe fool you. This is really an easy recipe so long as you monitor your cooking temperature and times. As you make your pancakes you may have to adjust the temperature a smidgen higher or lower for your stove/pan combination. Once you know the sweet spot, make a note of this for future batches. These are sweet, fluffy and a change from your everyday pancakes. Certainly they are the kind of thing you might pack for eating just plain on the road, in your car, on the way up to the stream or as a snack as you take a break between fishing holes. In my research I found a very similar recipe on Instagram by Kristin Morita. There is a nice video on her IG to see some of the cooking. She has lots of other Japanese dishes too. Let me know if you gave the recipe a try and how you liked them in the comments below. How Do You Plan a Great Year of Tenkara Angling?  Image by Freepik Image by Freepik As the new year unfolds, winter provides me an opportune time to chart the course for upcoming angling exploits. While planning is crucial, it's equally essential to leave room for spontaneity, enabling you to seize unexpected fishing opportunities when they present themselves. I am fortunate to have an understanding wife, who recognizes how important fishing is to me. She sees the positive impact being on a stream has had on my mental well-being. In return, I have also made a point to recognize that she has her passions and interests that I can in return support her with. Sometimes we can even share time doing both. We all have constraints of daily life from work and family to other responsibilities, the following tips can help transform your new year into a fishing year success, ensuring you spend more time on the water than you might have thought possible.
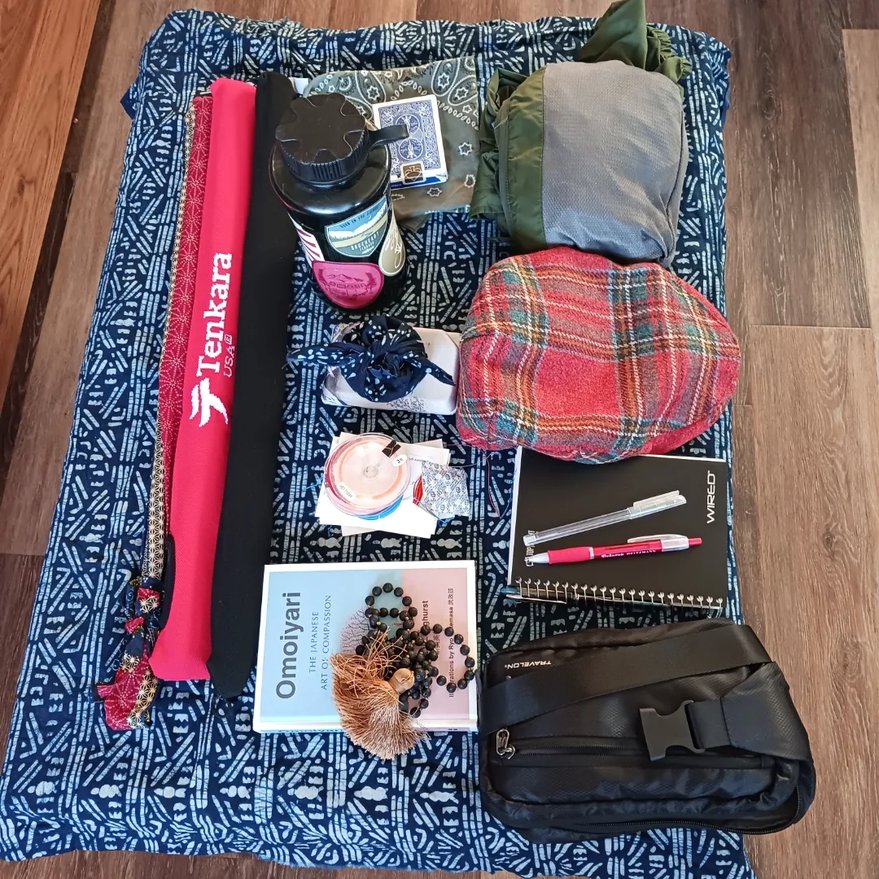
Preparing for my trip to Austria I made some good choices that served me and made some mistakes too. I hope that you will learn from my experience and avoid the pains but enjoy the benefits of packing smart. Destination fishing often requires you to pack bags and travel by airline. My trip to Austria was almost a disaster. There wasn't much time to wait around the airport to figure out what happened to my lost luggage and frankly the Munich airport really stunk at having a process for this. So we filed a claim and then drove from Munich to Mittersill (Austria). When we got to the hotel the first thing I did after checking in was to lay out what resources I actually did have. What you see in the photo below is most of what I had left with me as carry on baggage. It was by grace alone that I carried almost all of my rods and some of my tackle with me. What follow are my new thoughts and approach to traveling whether fishing or not to be sure that I don't have to relive the experience of dread again. I hope you like my thoughts and add your other ideas in the comment section.
Not shown in photo: A polypropylene long sleeve shirt, an extra t-shirt, My long sleeve fishing shirt, a pair of underwear, pair of socks and the clothes I was wearing.
|
|
I suggest this as a "in a pinch" approach only and can't guarantee it will work every time. To do this you will have to play "dumb traveler" a little and pretend that you are a little clueless. Carry a second carry on as your "Personal item."
Have you ever been flying somewhere and heard a flight attendant at a gate or even on the plane offer a passenger to "check" a piece of luggage? This is actually done regularly for people with children's car seats and strollers or when a flight is very full and the overhead baggage space is taxed. The little known thing about this is that these items are often just put in a special hold and removed at the next gate. I would caution you though that your bag may in some cases be checked into the main hold with the rest of the baggage and will need to be picked up at the usual baggage carousel. If you have a connecting flight this likely won't work if you have short layover. Depending on the airline though, you may be able to get your "gate checked" bag immediately as you exit the plane in the jet bridge between the plane and the terminal. |
According to Travel + Leisure magazine, "United Airlines Customers whose bags are gate checked are checked at the gate free of charge and can be picked up at the customer's final destination or at the jet bridge depending on the flight," Check with your Airline for their handling procedure for gate checked items. |
Check a bag only as a last resort
Now that you have read this far you may have noticed that I am suggesting that you don't need to check baggage most times unless you are staying for an extended time or have large amounts of needed equipment. There are times of course that we just can't carry everything we need. Those are the times that we have to think about what we are checking in and how we will feel if the bag gets lost. Airlines all have different track records for lost baggage and I found that my airline had a pretty crappy system for getting my luggage to me. Knowing this and also knowing the airline's responsibility legally for reimbursing you on your trip for "necessary" items is important. I had to purchase waders, boots, a net and some clothing. I am still in the process of getting my reimbursal for those items. (Wish me luck). Most baggage does make it through. Just be sure that your bags are well marked and that you haven't packed anything away that you absolutely MUST HAVE! Carry on the important stuff.
Now that you have read this far you may have noticed that I am suggesting that you don't need to check baggage most times unless you are staying for an extended time or have large amounts of needed equipment. There are times of course that we just can't carry everything we need. Those are the times that we have to think about what we are checking in and how we will feel if the bag gets lost. Airlines all have different track records for lost baggage and I found that my airline had a pretty crappy system for getting my luggage to me. Knowing this and also knowing the airline's responsibility legally for reimbursing you on your trip for "necessary" items is important. I had to purchase waders, boots, a net and some clothing. I am still in the process of getting my reimbursal for those items. (Wish me luck). Most baggage does make it through. Just be sure that your bags are well marked and that you haven't packed anything away that you absolutely MUST HAVE! Carry on the important stuff.
Travel with a minimalist mind-set and be an adventurer
Ultimately, I am suggesting that nearly everyone over packs. This over packing can actually be part of our stress. It is based in "what did I forget?" thinking. There is a great satisfaction to be found in being resourceful and remembering that travel is itself an adventure. Its supposed to be fun. Remind yourself that you don't need to take everything and the kitchen sink. The point of traveling isn't hauling everything along with you. You know what is essential and you know what is extra stuff "just in case." When we choose mindfully to pack "only what we need" we find that we often times have more space than we thought we would and can decide to put in one more t-shirt, jacket, sweater, or even snacks or gifts. Or.. Leave that space and know you have room to bring back gifts or mementos of your travel. I am opposed to the backpacker idea of "better to have it and not need it, than need it and not have it." This makes sense for backpacking but it doesn't apply to general travel.
Ultimately, I am suggesting that nearly everyone over packs. This over packing can actually be part of our stress. It is based in "what did I forget?" thinking. There is a great satisfaction to be found in being resourceful and remembering that travel is itself an adventure. Its supposed to be fun. Remind yourself that you don't need to take everything and the kitchen sink. The point of traveling isn't hauling everything along with you. You know what is essential and you know what is extra stuff "just in case." When we choose mindfully to pack "only what we need" we find that we often times have more space than we thought we would and can decide to put in one more t-shirt, jacket, sweater, or even snacks or gifts. Or.. Leave that space and know you have room to bring back gifts or mementos of your travel. I am opposed to the backpacker idea of "better to have it and not need it, than need it and not have it." This makes sense for backpacking but it doesn't apply to general travel.
|
I wish you the best adventures. Bon Voyage! Hey you!
I love to hear your thoughts, additions and ideas. Please use the comment section below to share your thoughts, ideas and questions. |

imagine this...
A good day of fishing and you return to your car smile on your face and a warm heart full of memories of the amazing fish you just had the fortune of meeting. As you start to pack your rod away.... Hmm? ..where is that darned end plug You were so sure you put it in your pocket... maybe it was the other pocket? Crap! Lost another one?
It happens to every tenkara angler eventually. Having to buy a replacement, stock end plug is actually a pretty expensive thing to have to do. There is a disproportionate divide between the size of an end plug and the price to replace it. Its just not worth it. I am reminded of the size to cost relativity with regard to a camera I once owned that was worth more than the car I was driving. When you compare apples and oranges though expect one to cost more?
Today I Present a Slightly Unorthodox Solution To this Challenge
Get ready to have your mind blown. I hope that what I am about to suggest will become a game changer.
1. Find a small box
2. Put all your remaining end plugs into the box.
3 Store that box in a special drawer and when you really "need" the end plugs, such as, when you go to sell the rod someday that you will know where to find it.
4. Now the last thing. Make any one or more of the following end plug replacements options.
The best way I have found to not lose end plugs is to not use them at all. Instead I have discovered that there are some ingenious and, dare I say, "fun" ways to leave your end plug at home and to have an easy to find cap for your rod. Yes, you are going to have to do a little arts and crafts for some of these but the reward for that is that you will have a cool and unique rod end plug that you so much less likely to lose.
Disclaimer!....A Quick Note About These Ideas That Follow-
While most of these ideas are mostly harmless to your rod, you will need to try these ideas with some discretion and care. By trying any of these ideas you are taking personal responsible for any damage you do to your rod because you didn't size it correctly. I'm just putting these ideas out there... How well or poorly you exercise these ideas is on you. These are all solutions I have tried and you can too. Just know that you must be very careful with your end plug to be sure that you don't damage the rod, or get debris that falls inside the rod. Use common sense and your creativity. But don't press your luck with a cap that is too tight and can damage or even split the tip of a segment, or that will leave behind particles that could get stuck in your rod.
While most of these ideas are mostly harmless to your rod, you will need to try these ideas with some discretion and care. By trying any of these ideas you are taking personal responsible for any damage you do to your rod because you didn't size it correctly. I'm just putting these ideas out there... How well or poorly you exercise these ideas is on you. These are all solutions I have tried and you can too. Just know that you must be very careful with your end plug to be sure that you don't damage the rod, or get debris that falls inside the rod. Use common sense and your creativity. But don't press your luck with a cap that is too tight and can damage or even split the tip of a segment, or that will leave behind particles that could get stuck in your rod.
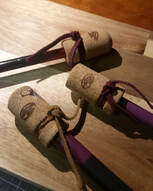
Wine Cork Up-Cycle
I have covered this one before... a couple times now. Save that cork from your next bottle of vino and drill a suitably sized hole in it to slip over the tip of your rod. Be sure to sand the inside well with fine sand paper to keep cork pieces from dropping into your rod. You can even decorate the cork with cordage. I promise you this end plug/cap will not get lost in the corner of your pocket either.
I have covered this one before... a couple times now. Save that cork from your next bottle of vino and drill a suitably sized hole in it to slip over the tip of your rod. Be sure to sand the inside well with fine sand paper to keep cork pieces from dropping into your rod. You can even decorate the cork with cordage. I promise you this end plug/cap will not get lost in the corner of your pocket either.

Large Pencil Eraser
I came across these really cool, skull shaped, pencil erasers the other day. The hole in the eraser was of course pencil sized so I had to do a little work with my drill press. I was able to drill a hole the same size as one of my rods and with a little sanding (as with the cork solution above) clean up the hole and now I have a rocking rubber skull tip end cap. Look at school supply stores and even in party supply shops for these larger erasers.
I came across these really cool, skull shaped, pencil erasers the other day. The hole in the eraser was of course pencil sized so I had to do a little work with my drill press. I was able to drill a hole the same size as one of my rods and with a little sanding (as with the cork solution above) clean up the hole and now I have a rocking rubber skull tip end cap. Look at school supply stores and even in party supply shops for these larger erasers.
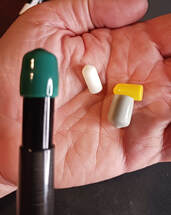
Thread Protector Caps
A trip to your local hardware or even auto parts store can offer plenty of great ideas. One that I have found are these thread protector caps. While they are perhaps just as easy to lose as stock end plugs, but at about 50 cents each they are still a great option. They do come in different sizes so you may want to take your rod in with you.
A trip to your local hardware or even auto parts store can offer plenty of great ideas. One that I have found are these thread protector caps. While they are perhaps just as easy to lose as stock end plugs, but at about 50 cents each they are still a great option. They do come in different sizes so you may want to take your rod in with you.
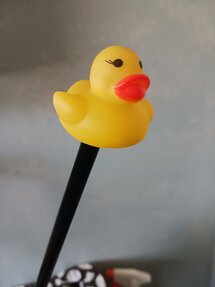
Rubber Ducky You're the One
Yes, I have totally lost my mind. Rubber duckies come in many sizes. I like the smaller ones for this. The rubber ducky is a fast way to make a tip end cap. Being hollow and soft, it is easy to cut an "X" into the base of the rubber duck (or if you dare... up the hind end) and fit the duck over the top of your rod. Will your fellow anglers find it odd? Perhaps but behind their giggles and snickering you will know that you still own all your rod plugs and that you are secure in yourself to do silly things sometimes.
Yes, I have totally lost my mind. Rubber duckies come in many sizes. I like the smaller ones for this. The rubber ducky is a fast way to make a tip end cap. Being hollow and soft, it is easy to cut an "X" into the base of the rubber duck (or if you dare... up the hind end) and fit the duck over the top of your rod. Will your fellow anglers find it odd? Perhaps but behind their giggles and snickering you will know that you still own all your rod plugs and that you are secure in yourself to do silly things sometimes.
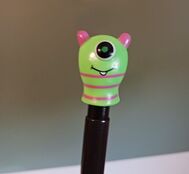
Children's Party Favors and Toys
Okay, the rubber ducky was cool but there are lots of other fun end plug caps you can find in a children's toy section. I found these party favor jumpers in a department store in a three pack for $1. I disassembled them in minutes and found out they fit at least two rods I own.
Okay, the rubber ducky was cool but there are lots of other fun end plug caps you can find in a children's toy section. I found these party favor jumpers in a department store in a three pack for $1. I disassembled them in minutes and found out they fit at least two rods I own.
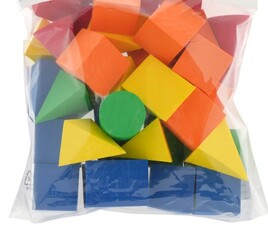
Craft Store Fun Foam
I am not a huge fan of plastics but they are clearly a part of our lives. Fun foam is a good way to create a new cap. It comes in a variety of shapes, colors and thicknesses. I have looked at using these as an insert material that would go inside the rod, but decided that a tip rod cap that goes around the outside of the tip is actually safer and offers more protection. Larger pieces of fun foam usually come in a box of multiple shapes. So you will have plenty of shapes to choose from.
I am not a huge fan of plastics but they are clearly a part of our lives. Fun foam is a good way to create a new cap. It comes in a variety of shapes, colors and thicknesses. I have looked at using these as an insert material that would go inside the rod, but decided that a tip rod cap that goes around the outside of the tip is actually safer and offers more protection. Larger pieces of fun foam usually come in a box of multiple shapes. So you will have plenty of shapes to choose from.
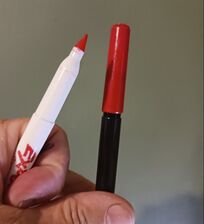
Pen Caps
Check your junk drawer for pen caps from old pens, dried out markers and ballpoints. There are a variety of sizes out there of course so you will have to see if any that you have will work. In this photo I found that an expo marker cap is a perfect fit for one of my rods. This will take some trial and error but this pen cap looks sharp (almost stock) and is easy to keep in a pocket and replace if needed.
Check your junk drawer for pen caps from old pens, dried out markers and ballpoints. There are a variety of sizes out there of course so you will have to see if any that you have will work. In this photo I found that an expo marker cap is a perfect fit for one of my rods. This will take some trial and error but this pen cap looks sharp (almost stock) and is easy to keep in a pocket and replace if needed.

What Ideas Can You Think Of?
Now we fell a little short of 100 ideas but the whole point is actually that our imaginations are endless. Together, all of our imaginations are just staggering. So please, use the comments below to share ideas you have come up with. Once you start looking at items as useful for more than one purpose you start to see things everywhere that can be useful in your life. Hacks are fun, useful and can save you money. I look forward to seeing your ideas too.
Now we fell a little short of 100 ideas but the whole point is actually that our imaginations are endless. Together, all of our imaginations are just staggering. So please, use the comments below to share ideas you have come up with. Once you start looking at items as useful for more than one purpose you start to see things everywhere that can be useful in your life. Hacks are fun, useful and can save you money. I look forward to seeing your ideas too.
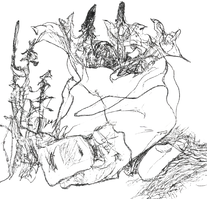
Over the last few years fishing tenkara, I have also honed my skills at identifying plants and even a few mushrooms along the way. When we are in the outdoors plants are all around us and having a little knowledge about wild plants seemed to fit in really well with my own practice. Foraging allows us to develop a deeper understanding and appreciation for the natural world while discovering a wide array of edible and sometimes medicinal plants that grow freely in our surroundings. Knowing how to identify plants that are poisonous or toxic can also be important. There is no way I could cover all the elements of foraging in this one blog post but I hope that it inspires you to maybe learn a few plants along your path. Just be sure to positively identify plants before you ingest them.
Some advantages of learning to forage.
You will likely be able to identify many common plants but it is essential to know your plant identification on certain plants 100% of the time.
Some advantages of learning to forage.
- Wild Plants Are Nutritional: Wild edible plants often contain a diverse range of nutrients, including vitamins, minerals, and antioxidants.
- Environmental Awareness: I find that foraging teaches me to have a deeper understanding of the local ecosystem. This kind of understanding fosters a sense of connection to nature within me.
- Free Food?: If you are backpacking or even just out for a day, knowing some of the edible plants, how they taste and what culinary offerings they have has its advantages. Much of what I forage I actually take home and use.
- Mental Health: Foraging is a great between fishing spots activity for me. It expands my experience and stimulates my curiosity about the wilderness. Its one more thing I can do while I am fishing.
- Medicinal Uses: There are plants that can really help you in a pinch with stomach problems, cuts and minor burns. Wild plants were used effectively by indigenous cultures and many have had scientific backing after the fact.
You will likely be able to identify many common plants but it is essential to know your plant identification on certain plants 100% of the time.
- Educate Yourself: So many books out there. You can find information for your immediate area as well. I suggest you take photos of plants you are curious about and then look them up thoroughly. Invest a little time in studying local flora, attend a workshop, or join a foraging groups led by experienced foragers. Positively identify edible plants accurately and distinguish them from toxic or protected species. Never ingest a plant you are not 100% sure of.
- Practice Sustainable Foraging: By adhering to the principles of "Leave No Trace." Avoid over-harvesting and only collect plants in areas where it is legal and permissible.
- Know Your Plants: Maybe I am being a little repetitive here but be confident in identifying edible plants. When in doubt, consult a field guide or an experienced forager. Start with easily recognizable species before progressing to more advanced plants.
- Avoid Polluted Areas: Stay away from areas that may be contaminated by pollutants, such as roadways, industrial sites, or chemically treated fields.
To begin your foraging adventure, I suggest you start with a few common edible plants that are relatively easy to identify and have minimal risks associated with them. At the beginning there is really no reason to actually harvest the plants unless you think you want to try them. Here are four easy to learn examples:
| Dandelion (Taraxacum officinale): Often considered a weed, dandelion offers a plethora of culinary possibilities. Its young leaves can be used in salads, sautés, or soups, providing a bitter and slightly peppery flavor. The flowers can be transformed into dandelion wine or used for herbal tea. The roots can be roasted and brewed as a coffee substitute. | Wild Garlic (Allium vineale): Wild garlic, also known as field garlic or crow garlic, is a versatile plant with edible leaves, bulbs, and flowers. The leaves have a mild garlic flavor and can be used in pestos, salads, or as a garnish. The bulbs can be utilized as a substitute for cultivated garlic, and the flowers add a delicate touch to culinary creations. |
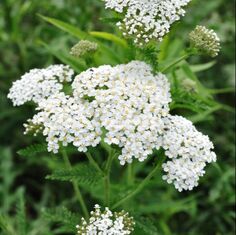
| Yarrow (Achillea millefolium) was named after Achilles, the Greek mythical hero who used it to stop the bleeding in his soldiers' wounds. Popular in European folk medicine, yarrow contains flavonoids, plant-based chemicals that increase saliva and stomach acid to help improve digestion. Yarrow may also relax smooth muscle in the intestine and uterus, which can relieve stomach and menstrual cramps. | Blackberries (Rubus fruticosus): Blackberries are a familiar and abundant wild fruit found in various regions. They are rich in antioxidants, vitamins, and fiber. Enjoy them fresh off the vine, or use them in jams, pies, smoothies, or desserts. Exercise caution and ensure proper identification to avoid similar-looking but potentially toxic berries. |
Foraging for edible plants in the wild allows us to reconnect with nature. By respecting safety guidelines, educating ourselves, and being mindful of our environment, we can add to our outdoor experience and build skills in self-sufficiency. Start small with easily identifiable plants and gradually expand your foraging knowledge. Remember, foraging is not only about finding sustenance but also about cultivating a deeper connection with the natural world. So, next time you are walking down a path or through a field, slow down to take a look around and see what incredible plants surround you. Happy foraging!
A little history on the "Wacky cake"
During the Great Depression, when resources were scarce and families struggled to make ends meet, a delightful and resourceful dessert known as wacky cake emerged as a popular treat. Wacky cake, also known as depression cake or crazy cake, was a unique creation that defied traditional baking methods. What made it truly wacky was the absence of expensive ingredients like eggs, butter, and milk, which were hard to come by during those difficult times. Instead, wacky cake relied on simple pantry staples like flour, sugar, cocoa powder, baking soda, vinegar, and vegetable oil. These humble ingredients were mixed together in a single bowl, creating a moist and flavorful cake that amazed everyone who tasted it. Despite its unconventional approach, wacky cake offered a taste of joy and indulgence during a time of hardship, reminding people that even in the toughest of times, a little creativity and ingenuity could bring sweetness to their lives.
During the Great Depression, when resources were scarce and families struggled to make ends meet, a delightful and resourceful dessert known as wacky cake emerged as a popular treat. Wacky cake, also known as depression cake or crazy cake, was a unique creation that defied traditional baking methods. What made it truly wacky was the absence of expensive ingredients like eggs, butter, and milk, which were hard to come by during those difficult times. Instead, wacky cake relied on simple pantry staples like flour, sugar, cocoa powder, baking soda, vinegar, and vegetable oil. These humble ingredients were mixed together in a single bowl, creating a moist and flavorful cake that amazed everyone who tasted it. Despite its unconventional approach, wacky cake offered a taste of joy and indulgence during a time of hardship, reminding people that even in the toughest of times, a little creativity and ingenuity could bring sweetness to their lives.
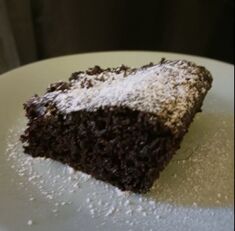
| Wacky cake is made of the simplest of ingredients and makes a very moist and chocolaty cake. You probably have everything you need in your cupboard right now to make one. As I was making this cake, I realized that I could easily premix the dry ingredients ahead of time and then add in the wet ingredients later. Would be great for trying to bake on a campfire? Traditionally this cake thought is made in a single 8x8 baking pan.. But you can still dirty a single mixing bowl and pour it into the baking pan to save yourself some mess of mixing the ingredients in the shallow pan. |
|
Ingredients 1 ½ cups all-purpose flour 1 cup white sugar 4 tablespoons unsweetened cocoa powder 1 teaspoon baking soda ½ teaspoon salt 6 tablespoons vegetable oil 1 tablespoon cider vinegar 1 teaspoon vanilla extract 1 cup water _____________________________________________ After it cools add your choice of Frosting, dust with powdered sugar, or as is right out of the pan. |
Directions
|
|
Have you seen the price of fly tying materials these days? Well, I haven't in a long while for most flies I make. I am guessing that like everything else the cost for fly tying materials hasn't escaped the current round of inflation. Fortunately, over the last few years I have learned to pare down my supplies and not to become a "materials hoarder." I try to buy a few capes, look for unique threads, and seek unconventional dubbing materials.
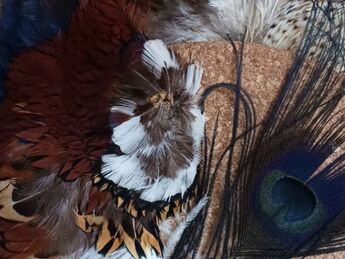
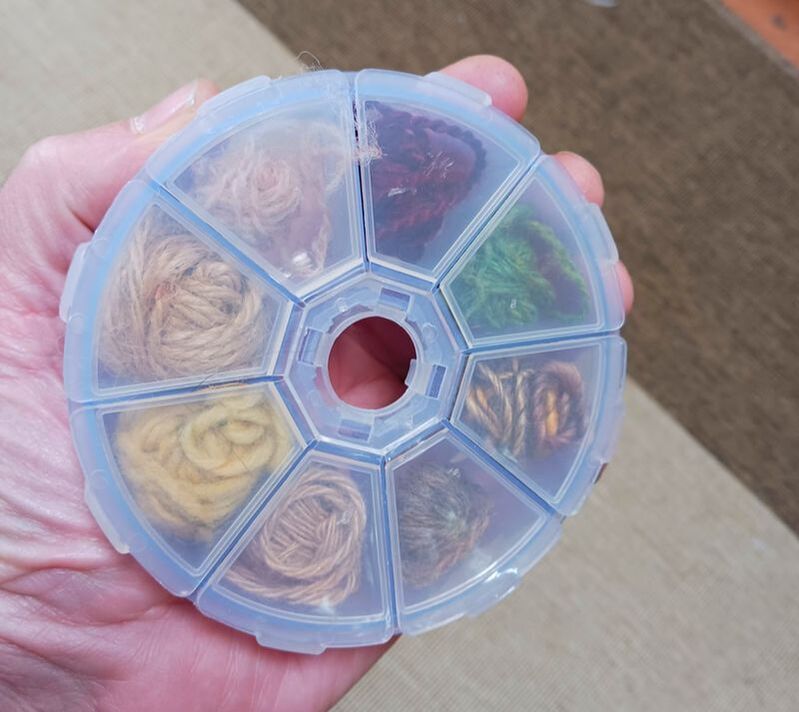
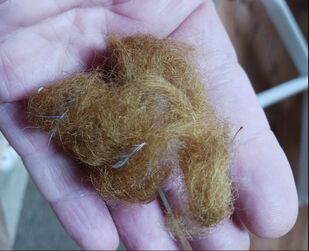
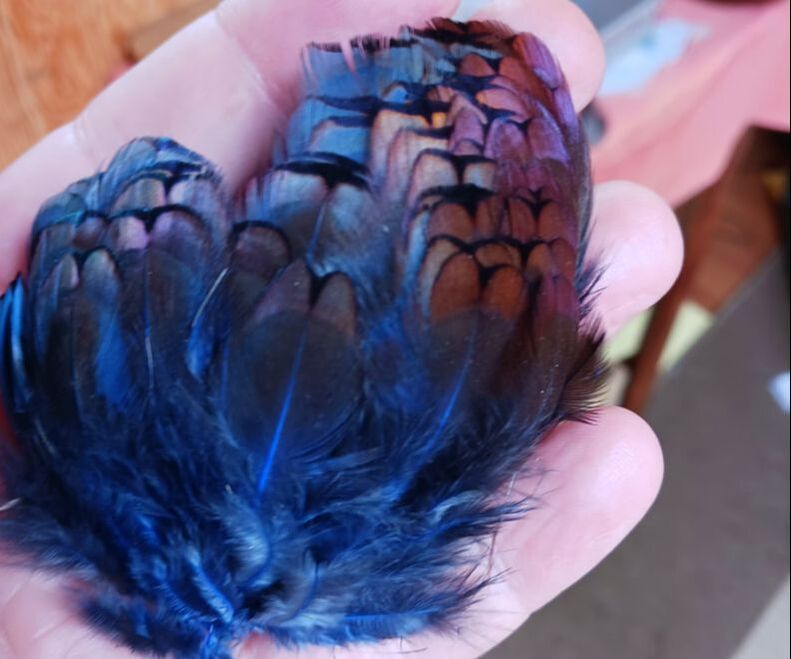
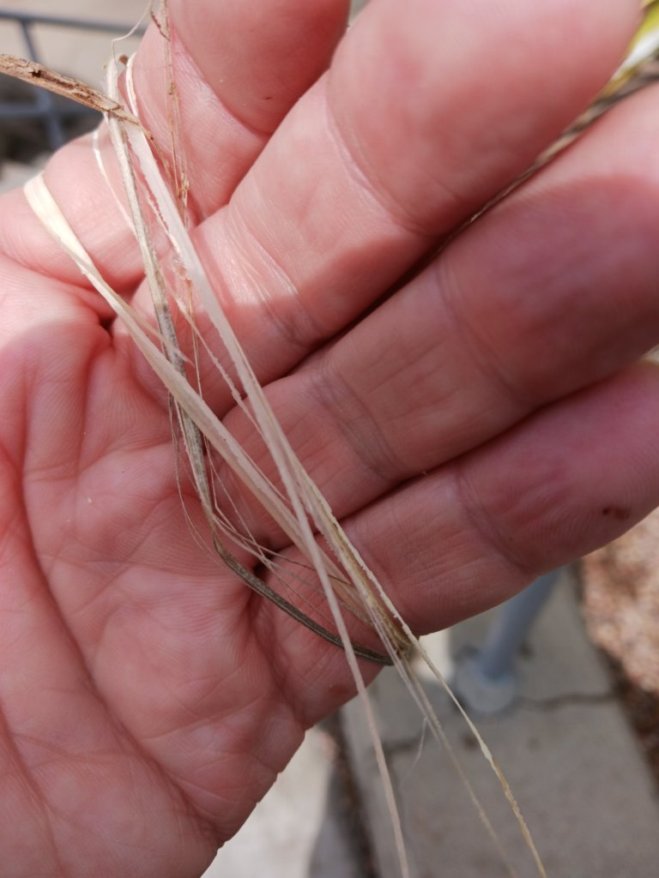
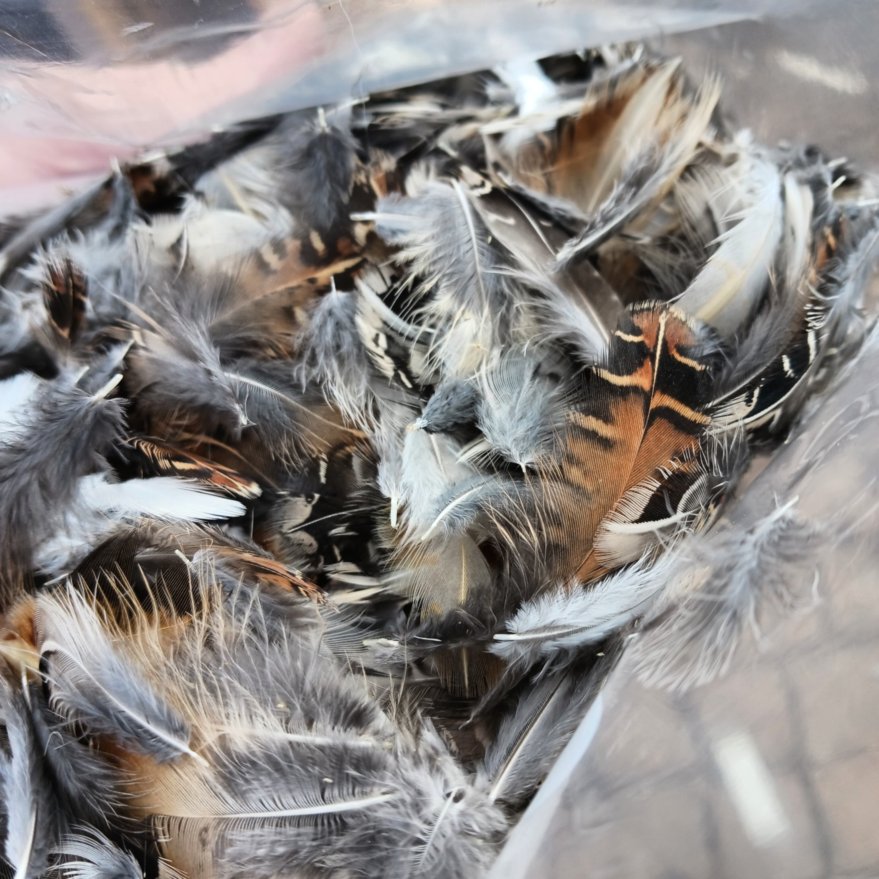
This is likely just part of my inclination and enjoyment I get from foraging. I guess I forage even in commercial places. Sure, I have purchased a few capes usually at the touring fly shows, and acquired my share of items from the "seconds bins" of fly shops. I found a happy place for the amount of materials I own at any given time and it takes a real whim for me to step out and purchase much in the way of additional materials. Once you have your base supplies you just do what you do with them. Our tenkara forefathers had it right with the concept of using what was readily available to them to make their flies. I like to think some days that I am continuing that practice and tradition. Let's start with some initial places to start foraging materials... Garage / Estate Sales My family loves a good garage sale or even better estate sale. These have been an interesting place to find fly tying materials. Garage sales can be spotty for materials, and sometimes it helps to ask about materials. Sometimes they are right there being interesting on a table. I find skeins of yarn, spools of sewing thread and occasionally balls of woolen felt that I can use for dubbing. One time I thought I had scored big with a taxidermy duck that unfortunately had dried out way to much to find much use with the feathers. But man was I excited at the possibility. Estate sales sometimes turn up materials in unusual ways. You have a wider selection of things to see as they are trying to get rid of more stuff at an estate sale than at garage sales. Keep your eye open for peacock tail feathers and even ostrich feather dusters... My wife just found one and I plucked a feather out for my tying supplies. In the wilds of your neighborhood When I walk my dog in the springtime we have a high school field we cross that is occupied by flocks of geese who often drop feathers here and there. I started picking these up from time to time and tucking them in my shirt pocket. Occasionally I remember they are there and put them into a bowl on my office desk and then occasionally again I actually get them to the vise to be tied onto a hook. I have also found natural materials in my backyard or while foraging. Things like yucca plant fibers, cattail or cottonwood fluff. Some of these things work better than others but you know why not give them a try just for the novelty. We have traveled to the ocean from time to time over the years too and in the tide wash up you might find some really interesting fibers that can be used as well. There area some great books out there on making natural fibers from plants in the wild. Look around your house. I won't give more than a small mention to dryer lint as dubbing. I do know though that I have in the past used scraps of yarn from my wife's yarn bin. We also have a pillow that she bought in our living room that is down filled and I have an annoying habit now of watching television and pulling out down feathers from the "pokey pillow". Not all feathers are equal of course. Once you know what you are looking for though you begin to see potential for some of these downy treasures. Fabric, bead and craft stores. Of course these stores will have some of the standards of materials but not always usable. You have to hunt a bit. I did however find a bead store that carries some really unique feathers as well as horse hair. A deep blue died pheasant that I continue to tie with. I love a good mom and pop yarn shop or embroidery store too. Friends with fur and feathers The increase in urban farmers across the USA has also created a great oportunity for feathers and even dubbing materials. Recently my eldest child, Alex (adult of 35 yrs old now!!!?) sent me a bag of feathers from their coop. They raise chickens and quail for meat and eggs. Quail have become as much fun for me to tie as starling feathers. I used to have chickens myself and there are always feathers dropping off inside the coop that are perfectly useful. As for fur... well, I have a friend who raises alpacas as well and he has been generous in the past with alpaca wool and even yarn that he has made from those wonderful beasts. Finally, I am guilty of brushing my dog out and finding a black fur that makes a wonderful dubbing material. It even "noodles" well. Check my shop soon for "German shepherd mix" dubbing... Just kidding. Have a fly tying event with a pot luck table of materials. We did this some years ago and I still have a some of the items from that table. You would be surprised how much stuff people are willing to just give away at these events. Sometimes I have purchased a cape and thought... I will never get through this whole cape. Its more than I need. We should consider when we buy full capes if we could maybe split them with a friend? Maybe I will set up a facebook group or use one of the current ones to create a swap meet event? Okay, this is too good and idea not to do... So look for the online event in the not so distant future. |
A word about "Micro Plastics" I have made a personal decision to stop using materials that don't break down naturally in nature. Many flies are lost to both creek and trees and we need to be mindful. So much is still out there on the market that is synthetic or "plastic". Too much of this is ending up in the environment. Of course we have very few options with regard to our tippet lines except to collect our scraps and keep them out of the streams. Too many yarns and threads are made from synthetic fibers. Consider using only natural fibers as part of your own effort to be green in your fishing. |

I have one of those brains that likes to wander at times and with that wandering there is a "wondering" that pops up. I am also the kind of person who makes time to explore and bring to life curious ideas. This is what is going on right now with me these days. A project idea has invaded my mind and there is but one way to exercise the demon. I have to experiment and tinker.
As I start out on this project, I am reminded of the movie "My Fair Lady". In that classic musical "Henry Higgins" (Rex Harrison) a well to do speech expert, takes on a project to convert a Cockney, working class wonan, Eliza Doolittle (Audrey Hepburn), and transform her into a "refined lady of society." You may be familiar with the story or even seen the movie or one of the many remakes of the play.
As I start out on this project, I am reminded of the movie "My Fair Lady". In that classic musical "Henry Higgins" (Rex Harrison) a well to do speech expert, takes on a project to convert a Cockney, working class wonan, Eliza Doolittle (Audrey Hepburn), and transform her into a "refined lady of society." You may be familiar with the story or even seen the movie or one of the many remakes of the play.
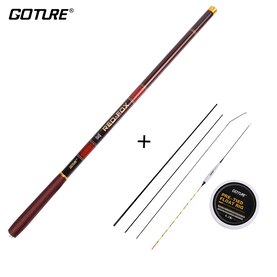
Meet my "Eliza Doolittle" for this project. Here she is, a Goture Red Fox 360. Let's call her "Eliza" going forward shall we? I found her wallowing around on the corner of a discount goods website, based out of China. You probably know the one I am talking about. She is a fishing rod but not a tenkara rod. To look at her you would say "looks like a carp rod" and you wouldn't be wrong.
While Eliza's initial features aren't actually unattractive, the closer we look the more we see her unrefined elements. When we ask her to cast, she reveals a stiffness in backbone that hides any element of grace or delicateness required for trout.
As the Henry Higgins of this tale, I have examined her and wondered... How much separates this somewhat vile creature from becoming a refined and elegant enough rod to use for trout species? To understand that of course we have to look to the core of her. See what she is made of. See what her strengths and weaknesses are and help her transform herself. The hope of course is that in the end, we can we find enough deep down under the surface to make her a passing and worthy rod. Can we move her from the clunky world of carp fishing into the more delicate and precise presentation that will allow us to consider her tenkara trout rod? Join me in this experiment.
Identifying some issues
Casting
This rod casts very heavy from the handle. The fulcrum point is really not well balanced like a tenkara rod would be. It wasn't designed for delicate presentations that kiss the fly to the water, it was designed to throw a heavier payload than a fly, dare I suggest even.. gulp... (the horror) ...bait.
In driveway casting, I found it to be a very, very stiff. Like a broom handle. I could feel my forearms taking in a lot of tension on each cast. My muscles tightening with each projection and once again in any retrieval or back cast I did with the rod. The rigidity seems to be ingrained in design at the lower segments. I am not sure yet if I will be able to spare the first segment and cut it shorter or if I will just create a shorter rod using the 2nd segment as the new "outer segment. Yes, I am going to be ruthless in my surgery process if I have to.
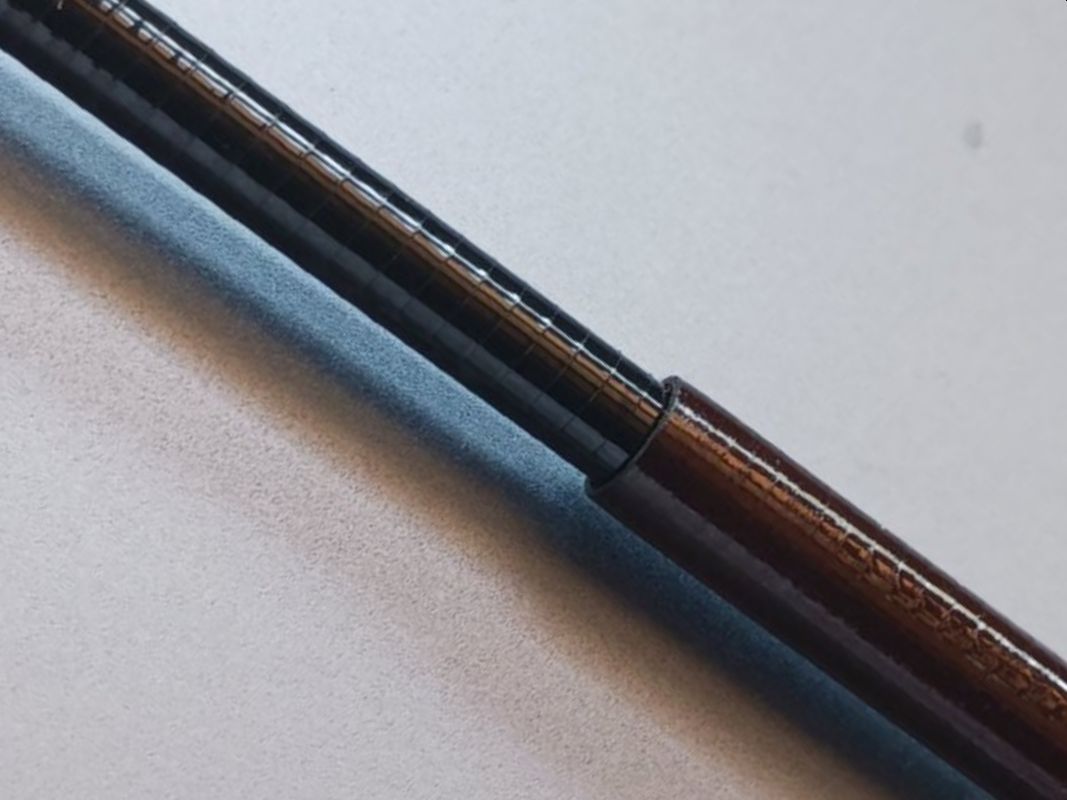
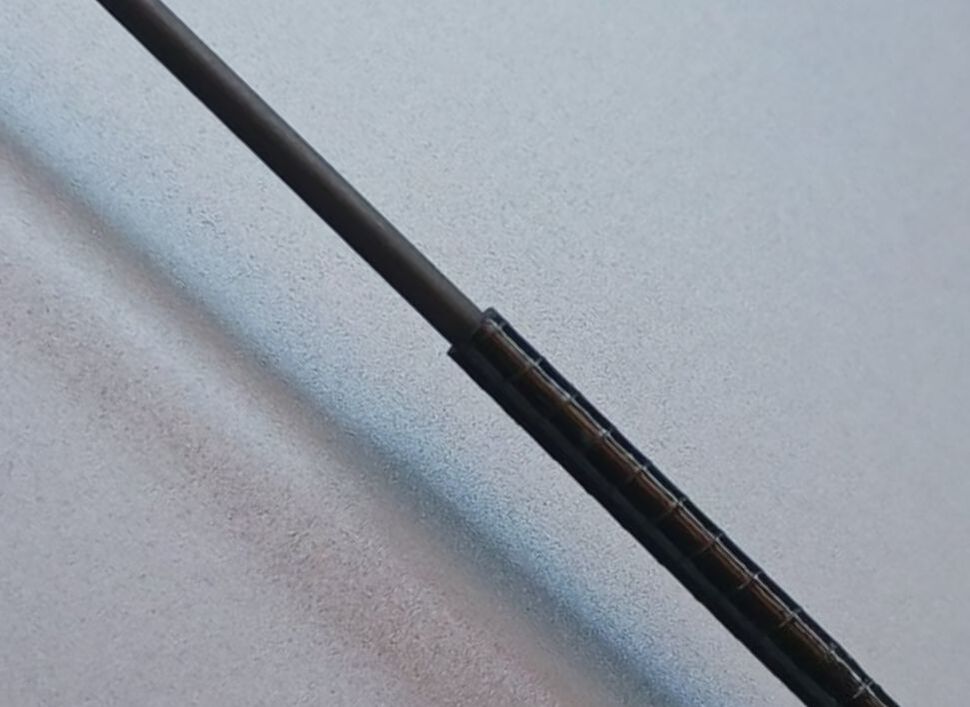
| Blanks Let me start with the outer blank. It is in my opinion the rod maker's cheat in design with this rod. This first segment is longer than the rest of the blanks by at least 4- 5 inches. I think they used the outer segment length to "stretch" the rod length to make it a 360. The rod has six sections that are all finish painted and glossy sealed. The remaining tip segment is like all other rods, unfinished but smooth. Flex Most of the flex in this rod happens in the last 3 segments. The 4th segment seems to bend only a very slight amount. There is a lot of faith being put upon the very tip of the rod. This is going to be a game of making due with what we have and finding a balance from the handle to accommodate this blanks innate nature. Segment Reduction I noticed visibly that there was a considerable difference in each segment as they dropped down in size towards the tip. In other words the progression of the reduction in diameter is very noticeable and there isn't much we can do about it other than accept that this lady will have to work extra hard to overcome these engineering shortcuts. |
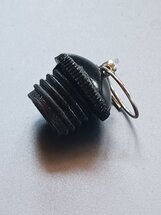
| Butt End Cap This is just just plastic and is not cushioned. Eventually this could lead to some impact fractures on the bottom ends of the segments creating chips and splits that will eventually jam or potentially not secure the connection and slip out. I am also trying to figure out what purpose the flimsy key ring has for this rod. |
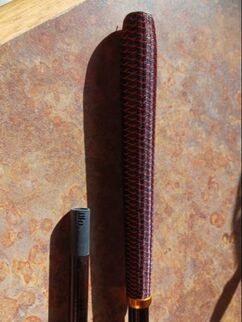
| Handle. Aesthetically the handle is attractive. I am not however a fan of this style of handle on any rod. They seem like a choice to me for novelty over function. Functionally, I hate it. I think a handle needs to fit in your hand better than these do and by design they are telling you that your hand placement has to be low and at the lowest end, which as I pointed out, sets the balance of the rod completely off and is going to result in some serious carpal tunnel syndrome by the end of the day. I like a handle that has some room for placement. |
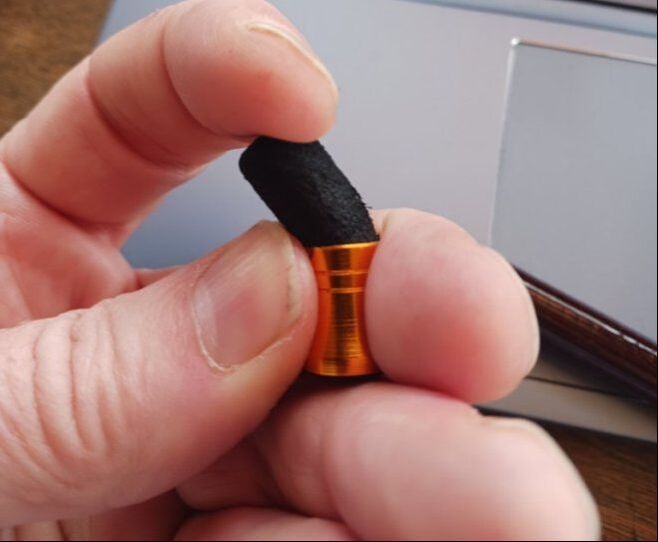
| Tip End Cap This is really one of the worst end caps I have ever seen. A thin aluminum cap with an soft (like foam earplug) plug glued into it, that is squishy and bends as you put it into the rod end. The foam plug is too soft and too long. I can see this catching on something and then tearing off flush with the end leaving the soft plug inside the tip. |
And there she is... the "before" shot.
So for all purposes I hope I was clear to you about the state of Eliza in her Cockney Carp Rod personality. Now I have to start slowly and meticulously make decisions on how to refine her.
So for all purposes I hope I was clear to you about the state of Eliza in her Cockney Carp Rod personality. Now I have to start slowly and meticulously make decisions on how to refine her.
My Plan for the month of April.
The curious side of me wants to know "can I make a crappy rod better if not at least decent? So I am going to be transforming this rod, cutting it up if I need to, turning out a new handle, adjusting it's center of gravity and seeing if this rough and unrefined rod can make a transformation. I am pretty sure I can make better but you will have to check in next month to see if actually turn Eliza into a passable tenkara fair lady for trout fishing .
The curious side of me wants to know "can I make a crappy rod better if not at least decent? So I am going to be transforming this rod, cutting it up if I need to, turning out a new handle, adjusting it's center of gravity and seeing if this rough and unrefined rod can make a transformation. I am pretty sure I can make better but you will have to check in next month to see if actually turn Eliza into a passable tenkara fair lady for trout fishing .
PATH NOTES
Learn cool things: Recipes, hacks, gear, instructional videos, and more!
Always something new to help improve your time on the path.
Have something you want to share? A cool hack? A recipe or trick you use when out in the field?
Past post
March 2024
February 2024
January 2024
November 2023
September 2023
August 2023
July 2023
June 2023
May 2023
March 2023
February 2023
January 2023
