Somewhere in the depths of hell, near the same corner where all the unmatched odd socks collect there is a second pile of lost items known exclusively to tenkara anglers around the world. Yup, a pile of rod caps. Its amazing how important these things are but also how quickly we lose them. Once you have lost one you realize quite quickly how actually expensive they are to replace. Today I want to teach you a quick DIY solution using just some basic tools that you probably already have in your garage or that can be purchased inexpensively at a hardware store. The instructions that follow are given with the express warning that any craft project has it's hazards. Please be careful when making your end cap and use common sense so that you still have fingers to tie your flies on with. 
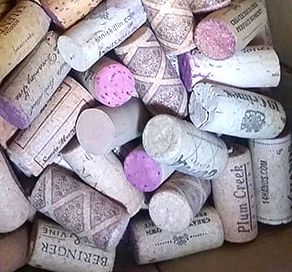
Step one: Collect some wine corks
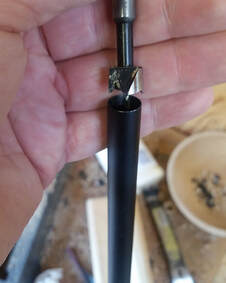
You may have a cork or two already living in a junk drawer in your house but if you don't start saving them from your favorite bottles of vino. If you don't drink wine then your next best free source is to ask the bartender at you local restaurant for a few. They usually have a bucket of them behind the bar. If you want to throw some money at the problem, then you can go to a hobby store and buy some there. You want a good selection to choose from as, the quality of corks varies. Corks come in different densities. While for the most part, any wine cork will work for this project I prefer the more dense cork. These are the ones that seem like they are made from lots of teeny tiny pieces of compressed cork. You will want a cork that isn't damaged or have too much damage done to it from the cork screw when it was pulled from the bottle.  Step Two: Sizing your drill bit You will want to pick a drill bit that is about the same size as your rod end. Don't worry if you go too big or too little at first, but get it pretty close to start. I use a "forstner" style of drill bit but you can use a standard bit as well. The forstner bit has a unique blade design that lets you drill smooth sides and a flat based hole. Once you have selected a bit. Mark the center point on the end of the cork with a sharpie. For the next step, put on some gloves or better still clamp the cork in a shop vice. Using a hand held power drill, slowly start drilling a bore into the cork. I said "SLOWLY" ...and I mean it. Don't rush as you will risk drilling all the way through the cork or worse still, out of the side of the cork and into your hand. Let the drill bit do the work. The slower you do this the more finished the hole will be. Alternatively, if you are lucky to have one, do this on a drill press. DO NOT DRILL ALL THE WAY THROUGH. Stop a little short of going all the way through the cork. Drill down so that about 1/4" (at the most) of the cork isn't drilled.
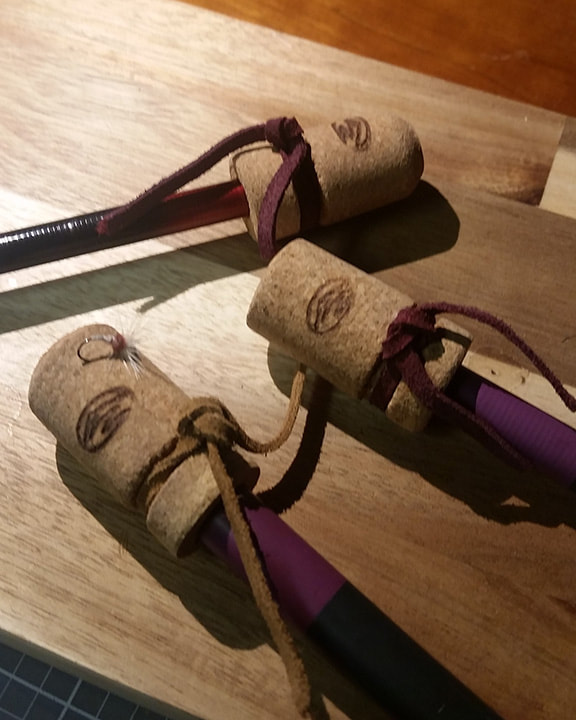
Step Four: The finishing touches Certainly you can decide that you are happy and now done with the cork cap at this point. BUT you may also want to kick it up a notch and sculpt it a bit. Cork sands very nicely. You can use a piece of sand paper to shape your cork cap a little too. Sand a bevel on the top end of cork or sand off the the printed design on the cork so that you can put your own personalize marks on the cap. Color the cork with a marker or stamp your initials onto the cap. I have found that it is a nice touch to put a piece of cording or rawhide on the bottom end of the cork near the hole. This can help add just a touch more tension to the opening and create a better grip of the cap onto the rod. To do this you should use sand paper to make a groove around that section of the cork for the cording to rest in. Once that groove is made you need to put the cap on the rod and then carefully put the cording around the groove and then cinch it down just lightly enough to make the cork contract slightly around the rod tip. That is all there is to it! You will also love that this rod cap is easy to keep track of and is also a great way to dry flies. Be sure to let me know if you try this DIY hack in the comments below. I am also happy to answer questions.
0 Comments
Leave a Reply. |
PATH NOTES
Learn cool things: Recipes, hacks, gear, instructional videos, and more! Have something you want to share? A cool hack? A recipe or trick you use when out in the field?
Past post
March 2024
Categories |
